Thursday, April 28, 2011

Strawberry Muffins


Good Morning Sunshinessss! Look what I made for today....Strawberry Muffins! I'm so excited because this is the first time I've ever made muffins from scratch. I was a bit nervous but in the end they turned out better than I expected.

For these muffins I would have probably used canola oil but I only had corn oil (another recipe I'm working on) so I used that instead. So if you end up making these let me know how they turned out for you.

What you will need:

3/4 cup All-Purpose Flour
3/4 cup Whole Wheat Flour
1/2 cup of Sugar
1 teaspoon of Baking Soda
1 teaspoon of Salt
1/4 cup of Light Brown Sugar
2 Eggs
1 teaspoon Vanilla
1/4 cup of Corn Oil (or Canola Oil)
1/4 cup of Milk (I used reduced fat)
1 cup of Strawberries, sliced or diced
1/2 teaspoon of Orange Zest
Lightly greased Muffin/Cupcake tray
  • Heat over to 375 degrees F/190 C.
  • In a large bowl mix the flours, white sugar, baking soda and salt until well blended.
  • In a small bowl beat eggs and light brown sugar together using a fork.
  • Add contents of the small bowl into the large bowl along with vanilla, oil, milk and orange zest. Mix well. Then fold in strawberries.
  • Using a 1/4 measuring cup, pour batter into each lightly greased muffin cups.
  • Bake for 15-17 minutes. Every oven varies so you know your oven best. Mine was done in about 15 or 16 minutes.
Have a great Thursday and I hope you find some time to relax and calm your mind during this crazy week!

Wednesday, April 27, 2011

It's an "Epic" Wednesday

So it's Wednesday and I'm feeling a little bit cheeky today. I don't consider myself an expert on food but I cook what I like and enjoy the experience. I watch a lot of cooking shows to see what's new and what old techniques are coming back. However these videos threw me for a loop and I absolutely love them. They take cooking shows to an "epic" level!


We're not done yet...


I wish I thought of making these videos in college when I was crazier and skinnier! Have a great wednesday and please go burn off what you've just seen. I couldn't help myself today.
Subscribe to their YouTube channel EpicMealTime

Monday, April 25, 2011

Easter Cupcakes Part Deux

 I ended up making more cupcakes the next day when we had some friends over for the day. I opened up a package of Jolly Rancher Jelly Beans and Annie's Bunny Grahams and this is what came of it...


A little artsy touch...going for a shooting star look.

Been eyeing this blue egg for a while...glad my husband liked it!

Friday, April 22, 2011

Easter Cupcakes, Full Time Wife Style!

Happy Friday Everyone! Hope it went well or is going well for you. Today I wanted to share some festive cupcake pictures of my take on Easter sweets.

So I had this idea I wanted to create a nest full of eggs because every candy maker seems to be going for the "egg" shaped treat. Well, I was thinking, "how am I going to create an edible nest?" I've seen people use coconut shavings, frosting, royal icing and so forth, but I've never seen an edible nest. Luckily, my husband and I stopped by Target to get treats for my little niece's Easter basket and we found something I never thought I'd find...edible grass! And it tastes like wafers without the cream. Yum and Yay!

Here's what happens with you put edible grass, candy eggs, Wacky Cake and Southern Rock radio station on Pandora together...


These next ones are for the kid at heart...that's about anyone who loves to laugh and enjoy life to the fullest. Raise you hands and dance if you're with me!!


Wednesday, April 20, 2011

Family Recipe: Uncle Sam's Sardines

It's packed with Omega-3 fatty acids and it comes in a can...I'm talking about sardines! This recipe was first introduced to me by my Uncle Samuel when I was a kid. He didn't cook all the time because of his busy work schedule but when he did, it was really man-food good. Come to think of it, all the males on my mother's side are great cooks thanks to my grandpa. And I know he wouldn't want me to announce this but Uncle Sam is still single, great with children, clean and he's a great cook! (hehe I'll ask for forgiveness later)

Well, this dish is best served with warm rice and a side of cold sliced cucumbers. The dish calls for tomatoes, I used cherry tomatoes this time but any kind of tomato will do. I hope you enjoy making and eating it as much I do!

What you will need:

1 can of Sardines in tomato sauce with or without chilies
6-8 halved Cherry Tomatoes (Use a different kind if you wish)
2 tablespoons of Vegetable Oil
3-5 cloves of Garlic, minced
2-3 stalks of diced Green Onions (separate green from white part)
1/2 cup of chopped Cilantro
2-3 Green Chilies, sliced or use 1 tablespoon of Red Crushed Peppers
1-2 teaspoon of Fish Sauce
1/2 a Lemon or Lime
Salt and Pepper to taste
  • Heat vegetable oil over medium heat. Then add garlic, chilies/red crushed peppers and a pinch of salt. Fry garlic until aromatic and slightly golden.
  • Add green onions (only the white part) and tomatoes, saute until tomatoes are softened. Press tomatoes to burst their pulp. 
  • Then add sardines, fish sauce, 1/4 cup of cilantro and salt & pepper to taste. Heat all the ingredients for about 2-3 minutes. Stirring gently occasionally. Squeeze lime/lemon over dish, mix in the rest of the cilantro and green onions, heat for 1 more minute.
  • Remove from heat and let cool for about 2 minutes.  Serve in a separate bowl from rice and add a side of sliced cool cucumbers for dipping! 
Just in case you were wondering what kind of sardines I used:
They cost $.69-$1 each and I used the Green can this time.

Tuesday, April 19, 2011

Stuff For Hosting...Thanks CB2

Yeah, I would say this tray's message says what I would like to say sometimes...but I usually keep that in my head. Anyway, I'm always on the lookout for funky and fun entertainment ware. I've subscribed to CB2 for about two years now and today I decided I'd take some time to see what's new. I found this tray for $15.95 but it's currently on sale for $12.95.

And keep your drinks cool with this spiffy Mars Party Tub that matches perfectly with your attitude tray.

Keeping it chill for $24.95

And I know these chopsticks looks a bit gimmicky but doesn't it look fun?! This would also be great for people and kids who would like to start learning how to use chopsticks. Makes me smile. In fact, browsing for things online and sharing them with family and friends is something I really like doing. I could share so much more today but I'll just start with these three.

$3.95 each but the experience is priceless, young grasshopper!

I'm just scratching the surface of CB2 today...check them out for yourself! I'm off for some online shopping. Have a great day!

Monday, April 18, 2011

Jucy Lucy Burgers

I have to give Cook's Country TV all the credit for introducing me to this thick juicy and delectable burger that my family will enjoy for many parties to come!

Follow the instructions (it's free but they require you to register an email address) and make sure you have a ruler handy because the thickness of the patty matters.

I know you can make one if I can make one. I've never ever grilled anything before and for a first timer I think I did a pretty darn good job. And Thanks to my husband for being there as grill support. Hehe.

Friday, April 15, 2011

Roasted Spicy Curry Cauliflower

Looking for something healthy that will liven up a main dish? Try roasting cauliflower! And when I'm talking healthy, this is dish is packed with some SERIOUSLY beneficial ingredients.

For instance, cauliflower. According to Dr. Michael T. Murray's answer from Sharecare.com, he says that cauliflower and it's cruciferous family of veggies contain compounds that may help prevent cancer. This vegetable has the detoxification, antioxidant and anti-inflammatory power to help you body eliminate cancer causing agents such as carcinogens. Other super heros in this recipe include garlic powder, onions and last but not least...Turmeric! Just lookup "Turmeric health benefits" online and you'll be bombarded with information that might prove helpful but most of all educational about how you can add spice and health to your favorite family recipes.

Here's what you'll need: 

1 Cauliflower divided in 1-inch pieces
1/2 an Onion, sliced or diced
2 cups of chopped carrots
1/4 cup of Vegetable Oil
1/4 cup of Balsamic Vinegar (optional)
1 tablespoon of Turmeric powder
1 tablespoon of Hot Madras Curry powder
1 tablespoon of Garlic Powder
1-2 teaspoons of Cayenne powder
1-2 tablespoons of Kosher salt (reduce if using Table Salt)
2 teaspoons of Black Pepper
  • Heat oven to 350 degrees.
  • Wash cauliflower and carrots (peeled), pat dry. Cut cauliflower florets into about 1-inch pieces. Chop carrots into 1/2 inch thick pieces. 
  • In a large bowl, toss all ingredients together until cauliflower is coated well. 
  • Pour mixture into a 9 x 13 pan and cover with aluminum foil, poke a couple holes for steam to escape. Bake for about 45-50 minutes. 
  • Take off foil, turn up the oven to Broiler. Broil for about 3-4 minutes or until you get a golden crisp top on the cauliflower. Be sure to keep an eye on your pan because not all broilers are created equal! 
This dish can get a bit spicy and if that's that case, you can definitely leave out the cayenne powder. Enjoy and Happy Friday! 

Wednesday, April 13, 2011

Rutabaga What?!


I was catching up on one of my favorite shows on Food Network, Chopped, and a particular vegetable that came out of the infamous black basket was a Rutabaga: ru-ta-ba-ga/ˈro͞otəˌbāgə/. According to Aggie Horticulture, a Rutabaga is similar to the turnip but more dense and grows larger than a turnip (as the picture obviously indicates). The contestants all had an interesting time (or less time) cooking this starchy root vegetable. I personally would have thinly sliced the rutabaga and bake it or deep fry it. You know, kind of turning it into some rutabaga chips. Sounds good in theory but I don't know if I would have had enough time according to the show's clock.

Well, I've never cooked this root veggie but I'm curious now. I think I'll make a trip to the market and see what kind of recipes I come up with. Have you cooked a rutabaga? Got any recipes? Write a comment or send your emails to Thefulltimewife@gmail.com.

"or ginormous rutabaga?" photo by Velcro. courtesy of Flickr Creative Commons.

Friday, April 8, 2011

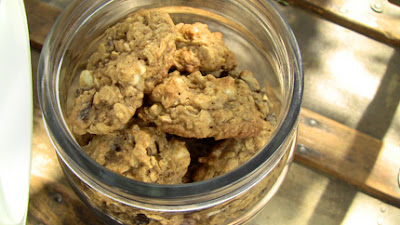
Oatmeal Raisin & White Chocolate Cookies...Thank You Quaker Oats!


Today felt like a Cookie Friday day. It's nice and chilly outside and I've been a good good person by not eating sweets this whole week. Plus, I've had this giant container of Quaker Oats staring at me every time I open my pantry to get some cereal in the morning. I couldn't resist, I had to make some oatmeal cookies. Or like my niece used to say "I need to make oatmeal cookies".

Here's how to make a really delicious treat:
This recipe is adapted from the original Vanishing Oatmeal Raisin Cookies recipe by Quaker Oats for more recipes visit www.quakeroats.com

1/2 cup (1 stick) and 6 tbsp of Unsalted Butter, softened
1 cup of All-Purpose Flour
1/2 cup of Whole Wheat Flour
1/2 cup of Dark Brown Sugar
1/4 cup of Light Brown Sugar
1/2 cup of Granulated Sugar
2 Eggs
1 teaspoon of salt (optional)
1 teaspoon Vanilla
1 teaspoon Ground Cinnamon
1 teaspoon Baking Soda
3 cups of Quaker Oats Old Fashioned, uncooked
1 cup of Raisins
1/2 cup of White Chocolate morsels
  • Heat oven to 350 degrees. 
  • In a small bowl mix flour, baking soda, salt and cinnamon together. Mix well.
  • In a large bowl, beat butter and sugars on medium speed until creamy.
  • Add eggs and vanilla; beat well.
  • Add the combined flour, baking soda, salt and cinnamon; mix well.
  • Add oats, raisins and white chocolate morsels; mix well.
  • Drop rounded tablespoon sized dough on ungreased cookie sheet.
  • Bake 8-11 minutes or until light golden brown. Cool 1 minute on cookie sheet and remove to wire rack. Cool completely. Makes about 4 dozen cookies but I made 3 1/2 dozen cookies.

Thursday, April 7, 2011

Chicken Pot Pie On The Fly

Last night this recipe was a last minute idea and this is the scene that played in my head:

[Cut to Chopped title animation]

[Fade up and zoom into close up shot of Ivanna]

Welcome to Chopped: Home Edition, I'm your host Ivanna Mochalatte filling in for host extraordinaire Ted Allen.

[Wide shot of my kitchen and me looking into my pantry and fridge]

In today's main course we have in our basket: drum sticks, butter flavored Crisco, Italian parsley and celery. Contestant will be allotted extra time...just because we can (and she needs it)!

[Medium shot of Ivanna]

On your mark get set...go!

[Scene cuts to close up of contestant working in kitchen, VO of my voice]

Okay, what to do with what I have in the fridge and pantry? Hmmm, I'm feelin' comfort foods. Maybe I'll make the first American dish I've ever made when I was 14? Right sounds good. But dang it, I've forgotten how I made it then. Oh well, I'll just go by the seat of my pants and pray that it turns out alright.

All I had in the fridge, as far as poultry goes, was a package of drumsticks. I boiled my drumsticks in a pot filled with water, some salt, pepper and rosemary. Cooked that until it was done. Drained the chicken (kept liquid for chicken stock) and picked off the skin, bones and gelatinous parts. Then I pulled apart the meat and gave it a rough dice.

What's in my kitchen:

8 medium sized cooked Chicken Drumsticks (read paragraph above on how to prepped it)
1-1 1/2 cups of diced Carrots
1 cup of diced Celery including the leaves (very aromatic btw)
1-1 1/2 cups of Frozen Peas
1 whole yellow/white Onion diced
1/2 cup of fresh chopped Italian Parsley
4 tablespoons of butter
2 tablespoons of Olive Oil
1/2 cup of Milk
1/2 cup of Flour
1 can of Cream of Mushroom
2 teaspoons of Thyme
1 teaspoon of rubbed Sage
2 teaspoons of Black Pepper
Kosher Salt
Chicken Stock from cooked Drumsticks

For the Dough:

2 cups of All Purpose Flour
6 tablespoons of butter flavor Crisco
7 tablespoons of ice cold water
1 teaspoon of Baking Soda
1 teaspoon of Kosher salt
1 egg for egg wash
  • Preheat oven to 350 degrees.
  • Prepare the dough by mixing in salt, flour and baking soda. Then add the shortening and roll ingredients through hands until you get the consistency of small pebbles (my girl Lacy is a pro!). 
  • Next add ice water a tablespoon at a time until you start forming a soft dough. You don't need to use all the ice water listed above, just enough so you get a dough that is not sticky but it isn't dry either. 
  • Work dough into a ball and plastic wrap it. Place in fridge.
[Scurrying to grab a pot]
  • In a pot over medium high heat add Olive Oil and fry onions until tender. Add 1/4 cup of chicken stock to keep the onions from browning. Then add the butter, stir it or whisk it and slowly add all the flour. While whisking add milk. 
  • Add celery, carrots, peas, chicken, cream of mushroom, thyme, sage, black pepper, parsley and 2 teaspoons of Kosher salt. Toss all the ingredients together until everything is coated in spices and cream. Turn off heat and let's turn our attention to the dough, shall we? You want a gooey consistency, not a soupy one. If it's too gooey, add a splash or two of the chicken stock. If it's too soupy add a tablespoon of flour each time until you get the right gooey!
  • Divide dough in half. Roll out first half of the dough on the bottom of the pie dish. Add chicken filling to the dish. You'll definitely have more chicken filling left over so don't feel like you have to use all of it. I'm saving mine for leftovers. 
  • Roll out the second portion of dough and place it on top of chicken filling. If you have small cookie cutters you can add a couple cutout designs to your pie. I made a heart cutout. If you don't want designs just use a fork and give it a good couple pokes for steam to escape. Brush pie with an egg wash for a nice finish. 
  • Bake pie for about 30-35 minutes. Serve and enjoy! 

Wednesday, April 6, 2011

Thai Red Curry with Chicken

Wonder what you can do with plain rice? Instead of pouring Chunky Soup on rice make Thai Red Curry with Chicken of course! (No offense to Chunky Soup because there are days when canned soup hits the spot. You know I love you Chunky Clam Chowder!)

This dish is one of our family's quick weekday go-to meals and I believe it's pretty much gluten-free if you eat it with white jasmine rice. By the way, try purchasing a bag of jasmine rice at an asian market, I promise you it's pretty delicious and compliments Asian cuisine a little better than the usual rice you find in local chain grocery stores. For more information on how to make rice check out my previous blog on rice here.

I like adding potatoes to my red curry and for this recipe I used peeled and diced russet potatoes because what's was available. If you use small yukons or reds there is no need to peel off the skin. Just give them a good wash and you can dice them depending on their size. For this recipe I would parboil the potatoes, drain and set aside.

Now back to making this dish:

1 pound of thinly sliced Chicken Breast
2 Tablespoons of Red Curry Paste
1 Teaspoon of Palm/Coconut Sugar or white sugar
1-1 1/2 cups of Parboiled Potatoes
1 Red Bell Pepper, sliced
1 can of Coconut Milk
1 cups of Basil Leaves, preferably Thai basil but if not Italian will do3-4 Thai Chilies sliced in the middle
1-2 Tablespoons of Fish Sauce
Salt to taste
  • Heat Coconut milk over medium high heat. Once heated, stir in red curry and palm sugar and heat until boiled. 
  • Add chicken and cook until the pink is gone but not quite done.
  • Add parboiled potatoes, bell pepper, chilies and fish sauce. Use salt to taste if desired. The key to most Thai foods is to adjust taste to your own liking. You've got the basic flavors going and now it's just about your interpretation of what you want your red curry to taste like. I like mine salty with fish flavor and mildly sweet. 
  • Once chicken is cooked completely add basil leaves. Toss curry and basil leaves for about 1 minute. Serve hot with warm rice! And for that extra something you can always squeeze a bit of lime.