Friday, April 30, 2010

Super Mario Galaxy Cupcakes


This cupcake blog is dedicated to Super Mario Galaxy fans (including my husband) all over the globe. This game has so much material to work with when it comes to creating cupcake designs. At first I just thought I'd create something easy...a little rock candy here than there and that was it. But with the help and encouragement from my sister Sam, we ended up creating something I'd like to share with you today. When it comes to attempting something creative, my sister Sam had a knack for making it become tangible. This is just one of many of her works with gum paste (she made the Pink and Blue ones).

When it comes to finding something whimsical and colorful, just like the game, you can't beat Japanese confections. So I found a Japanese store nearby and thought I'd take a visit. While I was buying some milk candy (another cupcake recipe idea), I found two bags of this...pixie-like clear candy that resembles the tiny stars you collect in the game. My husband was the one to plant the idea and I took it and ran with it. Oh yeah and for more fizzle I added some Pop Rocks...I guess my husband and I have never really grown up. That's one reason why I do love him so.


So here's the little stars up close...


Make sure to look out for Super Mario Galaxy 2 this May 23rd!

Wednesday, April 28, 2010

Real Women of Philadelphia Competition

Feeling ambitious and ready for a challenge? Well it's not too late to enter as many times as you want with as many recipes you can concoct with Philadelphia Cream Cheese.  It's called the The Real Women of Philadelphia challenge(s) visit: realwomenofphiladelphia.com. Yep and guess who's hosting? Why it's one of my guilty pleasures Food Network host, Paula Deen.

I'm thinking about entering this coming week's challenge on Appetizers and the last week is coming up for Desserts. So think fast and don't delay if you want to be a part of this.

I think I was just cheering myself on...

Tuesday, April 27, 2010

Graduation Cupcake Ideas

Hooray for all our graduates of 2010! Congratulations to my youngest sister. I can't wait for the celebrations this week. I'm so proud of her and it's going to be a great time. And guess who's invited? Cupcakes! Yeah.

Anyway, since I will probably be making grad cupcakes real soon, I thought I'd look for some inspiration. Much to my delight and dread, I've found a couple great designs that I could only hope to achieve in about a year's worth of practice. But since they stood out to me, I thought I'd share my findings. Mind you one of them is totally unrelated to a "graduation" theme but it would be on my wish list if there was another diploma headed my way.

Ready? Check these delights out:

Ah yes, this is very fitting and these darlings are the creative genius of Karen Tack and Alan Richardson of Hello, Cupcake! Even if you're not making anything for graduation you can't miss out on their creations via their website and books. I'm a fan of them and will probably be learning some tips and tricks they have posted on their website.


Trust me on this, I've searched the web for unique graduation cupcakes and these stand out of the crowd.  Seriously, caps and diplomas are the usual ideas but to see tiny books and a happy teddy bear...now that's getting too cute to consume from Icip-Icip Di Dapur.


Hello future healthcare workers!  My aunt is a nurse and if I was older back when she graduated, I would have happily attempted to make these cupcakes for her party. But I would never come close to making them so professionally like Montreal's Clever Cupcakes. They in turn were inspired by Julie of Blue Cupcake. May the chain of inspiration never be broken.

Photo "Doctor Cupcakes" via clevercupcakes on Flickr

Simple and outstanding are Lisa Smiley's Graduation Cap Cupcakes on her blog, Smiley's Sweets and Creations. Sure they were made for her kindergartner but wouldn't you want to make these for your grown-up kindergartner?


Okay, I've see this talented young lady on Food Network's Cake Challenge. I thought she was amazing then and she continues to keep me wanting more of her creativity on cake. Meet Anne Heap's take on a graduation inspired cake/cupcakes. You can find more eye popping cake designs on her website Pink Cake Box.


Well, I know where I'm ordering cupcakes when I visit the UK...
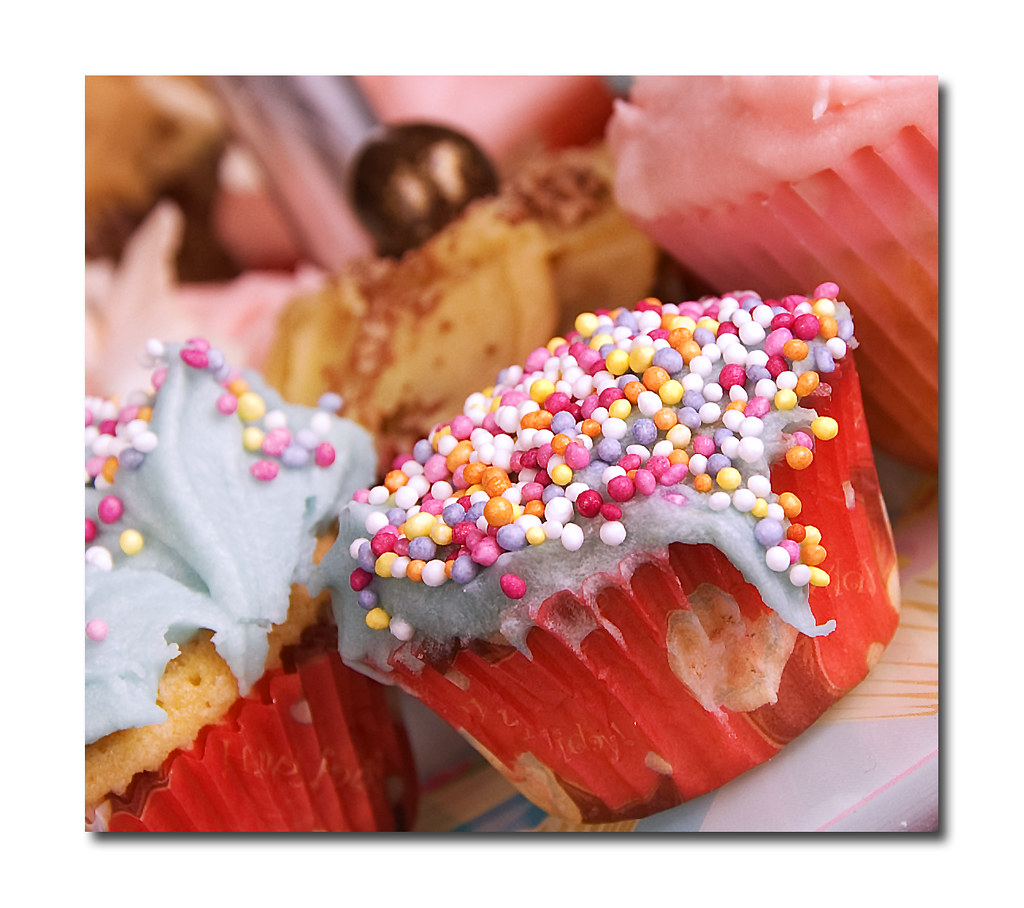
Crumbs And Doilies, of course. Not only does their website scream happiness and sprinkles, they also keep it organic when it comes to their ingredients. Oh and did I mention how wonderful they are when it comes to colors? Visually exciting my friends.


Last but not least, Clever Cupcakes will be getting a call from me when it comes to their "Not Your Rabbi's Cupcake..." Yep, this is a cashew cupcake frosted with a maple bacon cream cheese and a salty piece of bacon. Say hello to my little graduation!


Once again, CONGRATULATIONS to all you 2010 graduates!
You've earned it, now have a cupcake with me won't you?

Sunday, April 25, 2010

Mario and Pac-Man Cupcake Designs

Yesterday I made Maraschino Cherry cupcakes and designed them all accordingly. Fortunately for me, the cake mix allowed for about 2 dozen cupcakes. Sooooo, there was enough cupcake surface area left for other designs I wanted to create. My husband suggested creating toads, stars and turtles from Mario video games. I ended up creating an inverted toad head, a Mario star, a 1-Up mushroom and totally unrelated, a blue Pacman ghost.

For all of my decorations, I used Cake Mate writing icing kit. The icing is for writing so if you're thinking about more cupcake designs, I suggest you get more than one box. The box comes in four colors: red, blue, green and yellow. You can get them at your local grocery store and it costs about $4-$5.


For the character eyes I used Betty Crocker black decorating gel. Sometimes icing from decorating tubes can be a bit challenging to create tiny dots, like eyes, on cupcakes. At least for me, I have a hard time cutting off tube icing when I have the desired teeny tiny amount. So using decorating gel and a toothpick, for tiny objects like eyes, usually helps me get the desired peepers on my characters.

Here's how they turned out:

Still the game of choice for this family, especially on our Wii.

Here's Inky (Aosuke), the blue Pacman ghost, at a disco. Or I'd like to think so. 
 

My husband's favorite kind of cherry cupcake...chocolate, chocolate, chocolate. 

Mmmmm Trio Los Panquecitos

Saturday, April 24, 2010

Maraschino Cherry Cupcakes...Simple Bliss


Yum, yum, yum. I am so happy today because I finally made cupcakes. On today's menu: Maraschino Cherry Cupcakes.

Here's what I did:

A box of White Cake Mix (3 Egg Whites, Water & Oil)
A handful of Maraschino Cherries
A container of Fluffy White Frosting
A box of assorted food coloring, red for this one.

Pots, Pans and Misc:

Cupcake pan
Cupcake cups/liners
Food processor (if you don't have one, no worries)
Cooling racks (if you don't have one, no worries)
  • Preheat oven to 325 degrees.
  • First, take the handful of Maraschino Cherries and mince or put in food processor. Make sure the cherries are fine and not chunky.
  • Follow instructions on the box for batter.
  • Fold minced cherries into the batter.
  • Line cupcake liners in pan. Add 2/3 of batter into each cupcake cup.
  • Bake for about 20-22 minutes.
  • Once baked let cupcakes cool for about 10 minutes. Remove the cupcakes and in a cooled cupcake pan repeat steps 5 & 6. 
For the frosting I took out however much frosting I needed and just added one drop of food coloring.  If you want a lighter color, then add more the white frosting. And for the cherry on top, pat cherries dry before you place that finishing touch on your cupcake.

Pleeeeeaaaseee, with a cherry on top? Okay...

Thursday, April 22, 2010

It's Time...

...to unleash my cupcake obsession!

This week I will attempt to bake at least a dozen or so cupcakes. Next week I'll be celebrating my sister's graduation, maybe I'll bake cupcakes there too.

Either way, it's time I do something about my craving. It's torture, let me tell you. I love cupcakes for as long as I can remember. I could eat a dozen and more in a few hours. So could my husband. And everywhere I window shop, explore and even grocery shop, I find a delicious and inviting cupcake. Oh my goodness.

Anyway, I have concocted a couple recipes and designs for the cupcakes I want to make. I'm still in the process of figuring out what, where and how this will all come together tastefully. This has been something I very much look forward to sharing with you and thanks for reading.

Wish me luck, dear blog-readers.

Photo: "Vanilla Cup Cakes with Sprinkles" by StuartWebster of Flickr's Creative Commons 

Wednesday, April 21, 2010

Sour Mustard Greens and Eggs

Yes, I promised you I'd blog more and making it on a Wednesday night for me is quite the feat. But enough of me. How about more fooooooood?

Today's dish is a simple yet underrated delight from Southeast Asia and from my mother's kitchen to yours. Mind you most of the dishes that I have posted, have all come from her dinner table. I intend to pass her legacy into your homes and bellies in honor of her.

The star of this dish is sour mustard or I'd like to call it, Asian Sauerkraut (I'm sure my German-descended friends would appreciate this one, you know who you are). You can find this in a single packet or more but I buy the single packs for about 79 cents to a $1. In my words: Cheap eat, full tummy.

Here's what you will need:

2 Packets of Sour Mustard
5 Cloves of Garlic
3-4 Large Eggs (depending on how much you like protein)
3 Tablespoons of Oil (Olive, Canola or Vegetable)
1 Tablespoon of Light Soy Sauce (I use Healthy Boy Mushroom flavored)
Salt and Pepper
Cilantro sprigs for garnish
Fish sauce as condiment

Pots, Pan and Misc:

A Wok, large pan or a large pot
A bowl to whisk the eggs
  • First prep your ingredients. Whisk the eggs together, adding a little salt and pepper. Set that aside. Mince or pound garlic. Finally, cut Sour Mustard into thin strips.
  • Add 2 Tablespoons of oil to the wok and turn on the stove to medium heat.
  • Once the oil is heated but not hot, add garlic and stir until fragrant for about 30 seconds. We don't want it to turn golden, just sweated.
  • Add the Sour Mustard. Stir fry Sour Mustard until it is coated and tender. The mustard should go from it's original color of greenish yellow to a yellow green. Meaning, more yellow than green. So that should be about 4-7 minutes.
  • Move the stir fried Sour Mustard to the side of the pan. Add 1 Tablespoon of oil and let it heat for about 20 seconds or less. Add the eggs.
Scramble your eggs until they are more solid than wet. Once they are scrambled, mix in the mustard that was set to the side of the pan and add the tablespoon of Soy Sauce. Stir well until it is all uniformly mixed. Add more salt and pepper to taste.

Serve with warm rice, garnish with cilantro and fish sauce on the side. Oh yeah for more heat you can also add red pepper flakes.

For a slight variation, I've added a little sugar before. I've actually had sweet and sour fried mustard greens before. Not my favorite but I know it wouldn't have been sold if it wasn't somebody's favorite.

Monday, April 19, 2010

My First Time: Ben's Chili Bowl


I am no longer a Ben's Chili Bowl-Virgin. Haha.

My curiosity and anticipation has been fulfilled by a Chili Half Smoke and Chili Cheese Fries. This has been one amazing experience at an iconic Washington, DC landmark. My husband has always suggested I go there but each time he suggests, I have other food cravings. Well, my friends, that was not the case this weekend. Of course, a little coercion from Anthony Bourdain and Adam Richman never hurt one's case for visiting Ben's Chili Bowl.


Well, we got there at a magical time when the line was just beginning to form. But when it rains it pours at this joint. So get there whenever you can and don't give up if the line seems a bit long to you.  It's fast food so it's not terribly long and it's worth the wait. The atmosphere is something to remember and enjoy. The grill is smoking with flavoricious meats, the jukebox is pumping a Bob Marley tune, the walls are plastered with celebrities and influential people of our century and the service is straightforward. Not to mention, people waiting in line seem to be nicer than usual, strange. Oh yes and did I mention to bring cash? CASH TRANSACTIONS ONLY.

For more information here is the link to their site. One more thing, there's also a gift shop now. I'm thinking...Ben's Chili Bowl apron. :)


And that is why we love Ben's Chili Bowl.

Friday, April 16, 2010

Attack By Kitchen


Sometimes there are days when I feel like my kitchen is attacking me one accident at a time. Tonight, as I was transferring my stir fry from the wok into a storage container, I took one scoop and in an instant I see food flying straight for freedom. Argh! Now the floor is speckled with eggs and pickled mustard greens (Doesn't sound appetizing but I promise you, you'll like the recipe). Nice work!

Oh yeah, and the other night as I was adjusting my cookbooks on the shelf, my tin can of pencils and pens tipped over and pretty soon I was ducking from sharp objects. I'm sure my pots and pans were laughing at me. My kitchen hates me this week.

Maybe my kitchen wants me to cook more? Maybe I need to blog more often? Probably.

So I guess the key to peace between this Full Time Wife and her kitchen would have to be...more cooking and more blogging. Yes. I agree with myself today. Tomorrow, I don't know. But for now, there will be more frequent blogs from this kitchen for the next week.

Yes. Okay. I can do this.

Thanks for listening to me and my brief stories of kitchen clamor. Have a great weekend!

Photo: "Line of Control close-up, Subodh Gupta" by victoriapeckham of Flickr's Creative Commons

Saturday, April 10, 2010

Man vs Food: Brooklyn Show's Inspired Pizza


I've finished and caught up with all my "No Reservations" episodes on Netflix. So just recently I began my quest for more food viewing pleasure (or pain in this case) with Travel network's "Man vs. Food" show. Yeah, Adam Richman kind of worries me sometimes, as most of you know, he can pack in a lot of food and I just worry about his health. But I'm sure he'll do just fine on his own. It's just that it wouldn't be Man vs. Food without him, that's all.

Welp, anyway, my husband and I caught his Brooklyn show and we were very inspired to try and make the famous L&B Spumoni Gardens' Sicilian style pizza. Of course they're not going to reveal all their secrets so I improvised a little on the sauce and the shape of the pizza. Overall, the experience was fun because I tried a new cheese and it was sinfully delicious.  Now all my yoga workout just down-dogged out the window.

Here's what you will need:

3 sacks of Pre-made Dough (find them at your local grocery)
1 Can of Marinara
1 Small can of Tomato Paste
1 Small can of Water (using the Tomato Paste can)
A handful of fresh Basils
3 Large cloves of garlic or equivalent
2 Blocks of Mozzarella Cheese
1 Wedge of Pecorino Romano Cheese
1/4 Cup of Sugar

Pots, Pans and Misc:

2 Large Pizza Pans
A Rolling Pin
A Food Processor
  • Preheat your oven to 425 degrees.
  • First let's start off with the pizza sauce.  In medium pot, on low heat, combine the can of Marinara, Tomato Paste and Water.
  • In the food processor, process the garlic and basil. You want it all to melt into the sauce.
  • Add the garlic/basil mixture, the sugar and some salt and pepper to taste into the sauce. Stir the ingredients and cover, leaving the pot on low heat. Let that work it's simmering magic while you prep the other ingredients.
  • Cut your blocks of Mozzarella into rectangular slices. Grate enough Pecorino Romano to sprinkle a healthy dose for two large pizzas.
  • Divide the three sacks of dough for two pizzas.
  • Work your dough with your hands. Rolling the dough too much is not good. But do it just enough to get your hands easily shaping the pizza in a circular or rectangular pan. I chose circular this time because of the amount of dough I had to work with. Thick crust is good for this recipe.
  • Once your pizza dough is shaped, remove the pizza sauce from heat and let cool.
  • Place your sliced mozzarella on the pizza dough. Yep, we are not going to go for the sauce first this time.  Place cheese evenly to get cheese melting all over the pizza.
  • Now, spoon and spread the sauce on both pizzas with the mozzarella base.
  • Sprinkle a hefty amount of Pecorino Romano on both pizzas. Drizzle a little bit of Olive Oil on both.
  • Place pizzas in oven and bake for about 20 minutes. Make sure you check your pizzas as oven temperatures do vary.
  • Once it's bubbly and dough is golden, you're ready to enjoy this L&B Spumoni Gardens' inspired delight.
For those of you making your way to Brooklyn, NY this year here is their address:
2725 86th St., Brooklyn, NY 11223
Restaurant: 718-449-6921
What's your favorite inspired dish from Man vs. Food? Do share.

Friday, April 9, 2010

Family Recipe: Fried Rice, FTW Style

It's Friday and I must do what I promised I'd so since this past weekend. It's been a crazy week but I look forward to writing more during the weekdays to come.

So I received a blog request last week and it was for how to make fried rice...my way. I hope you enjoy it as much as my husband and I do. Now for this recipe, I've used sweet Chinese pork sausage. You can purchase these packages for about $5-$6 at your local Asian market. If not, try finding a Thai market to be more specific. But all that aside, know that you can substitute this meat for other protein such as chicken, pork, shrimp or tofu. Make sure all your proteins are always cut into bite sized pieces, for the enjoyment of mastication.

For a reduced sodium version of the recipe do try Kikkoman's reduced sodium.  But once again, if you every make a trip to a Thai market, I highly recommend getting Healthy Boy brand mushroom flavored soy sauce. This soy sauce is great for stir-fries and this fried rice.

But first things first, make about 2 cups of uncooked rice. The key to non-mushy fried rice is non-mushy rice and less moisture in general. You'll see what I'm talking about. But make your rice ahead of time so you can fluff and let cool before you add it into the mix. This recipe will serve up to 5-6 people. This also works great as leftovers for up to 2 days in the fridge.

Here's what you'll need:

Cooked and cooled rice (however much 2 cups of uncooked rice yields)
1-1 1/2 lbs of  bite-sized Meat (Chinese sausage, chicken, pork, shrimp or crab)
3-4 Large Eggs
1 1/2 Cup of thawed and dried Carrots and Peas
1 Large Onion diced
4-5 Cloves of minced Garlic
3-4 Tablespoons of Soy Sauce
4 Tablespoons of Oil (Olive or Canola)
3 Sprigs of entire Green Onions chopped
Sprigs of Cilantro for garnish
Salt and Pepper

Condiments:
Limes (depending on how sour you like it)
Fish Sauce
Thai chilies cut up
Ketchup
Mae Ploy Chicken sauce

Pots, Pans and Misc:

A wok or large pot
A frying pan
Paper towels
A plate
  • Let's start by prepping, shall we? Scramble your eggs with a little salt and pepper to taste. Add a teaspoon of Soy Sauce and whisk eggs.
  • In the frying pan, add 2 tablespoons of oil and make sure the pan is really really hot before you pour in the eggs. If you use 4 eggs you can separate the egg batter into two separate batches to fry. Once the pan is steaming hot, add the eggs and let it bubble and get a little golden before you turn it over. Flip the egg to cook the other side. Repeat if you have 2 batches to make.
  • Place a paper towel on the plate and place the fried egg on it. Use extra paper towels to remove excess oil. Set the eggs aside to let cool.
  • Once the egg is cooled, cut eggs into tiny 1 inch strips. It doesn't have to be exactly 1 inch just make sure its enough to look great mixed with rice and all the other ingredients.
  • In the wok/large pot, heat the remaining oil over medium. We're going to add our garlic and we don't want to burn the flavor, just sweat it.  Add garlic and stirring frequently, let it sweat and release it's natural aromas for about 30 seconds. Add onion and continue to stir until onions are tender.
  • Add the meat. If you use Chinese sausage, the meat must be pre-cooked prior to adding into the wok. If you use the other meats, just add in raw and cook till the pinkness is no more. 
  • Add the thawed/dried Carrots and Peas and sliced eggs. I say dried because too much moisture from these guys will get the fried rice mushy and that's not where we are going. Right? Right. 
  • Once the ingredients are mixed well, add the rice and drizzle all the soy sauce on the rice. Start working the soy sauce through the rest of the ingredients. Stirring and frying that rice until the white of the rice has become brown from the soy sauce. If that's not enough sauce, don't be shy, add a little more at a time until you reach a desired coverage. 
  • Finally add green onions. Keep stirring so that everything is evenly distributed. Add salt and pepper to taste. 
  • Garnish with Cilantro and serve!  Enjoy a combination of condiments. I like to add a little fish sauce, squeeze half a lime, add some Thai chilies and squirt some ketchup on my fried rice. Hmmm...Aroi mak mak (Very good in Thai). 

Sunday, April 4, 2010

Happy Easter, My Fellow Grown-Up Children


I did not know it was sort of, kind of, maybe...a tradition to give children and grown-up children Easter Baskets for Easter. Wow, what a great way to spread MORE sweets and happiness throughout the year. But yes, I do know the meaning of Easter and to compliment that my husband surprised me this morning with a basket just for me. Totally unexpected.

Maybe next year I'll start surprising other grown-up children with an Easter basket. :)

It's a beautiful day and I'm so glad we get to celebrate the true meaning of Easter. Hope the rest of your day is a fabulous one. Eat as many deviled eggs and ham as you can for me.

Come back this week, I'll be posting a request blog about how I make my fried rice. These baby chicks will not be in the fried rice....I'm not THAT morbid. They are just too cute and that's why I wanted to include them in this entry. Who can resist cute puffy chicks?

Thursday, April 1, 2010

Gaeng Massaman Gai (Massaman Chicken Curry)


I like curry and if it can be Thai curry, even better. This was my second attempt at making this rich and creamy dish and I have to say, it was a success. My husband took it work and had some for dinner the day after. If seconds and thirds were going, then it must have been a hit with him.

I've taken a couple recipes of how to make this curry. One great resource for Thai food is ImportFood.com. I picked out what I wanted and what I didn't want according to my own tastes and ended up with this concoction. I hope you can try it and see what you think of Massaman Chicken. After you have tried this, you can see for yourself how you would like your own curry the next time you try it again. Will it be a little sweet, sour or salty? I wouldn't know. You decide. Happy eating!

What you will need:

2 lbs of Chicken (we used chicken breasts)
3 Large All-purpose potatoes
2 Large onions
1 Can of Massaman curry paste
4 Cups of Coconut Milk
3 Tablespoons of Fish Sauce (Tiparos brand)
2 Tablespoons of Palm Sugar or White Sugar
2 Tablespoons of Lime juice
3 Kaffir leaves
5 Cardamon seeds
1 Cinnamon stick
2 Tablespoons of roasted peanuts/and then roughly ground
Tamarind Juice (1 Tablespoon of Tamarind concentrate and 2 1/2 Tablespoons of water)

Pots, Pans and Misc:

A large pot with a lid
A pot for partial boiling of potatoes
An enthusiastic potato peeler
Trusty can opener
Measuring glass
Let's get started!
  • Prep the potatoes by peeling, cutting them into large 1 inch chunks and partially boiling them. After they are boiled, keep them aside until further instructions.
  • Quarter your onions, keeping them large and chunky.
  • Roast your peanuts. You may have them whole or grounded. My family likes it grounded.
  • Cut your chicken into bite sized pieces.
  • In the large pot that has a lid, over high heat, add your can of Massaman curry paste and 1 cup of coconut milk. Stir the combination until the heat has allowed the oils in the paste to become wonderfully fragrant.
  • Add the chicken and cook the chicken. When the meat is no longer pink, add onions and stir some more.
  • Once the onions are a little heated through, add the rest of the ingredients into the pot. Give it a good stir. Now, it's going to look a bit soupy due to the cups of coconut milk we've used. But not to worry. Bring the curry to a boil and reduce heat about 2 notches. Keep your pot open for about 15 minutes.
  • After that, cover pot and let it keep cooking until the coconut milk is reduced to a thicker and creamery consistency. You may think this sounds like an "Old School" way of giving out a recipe. You know, where you never know the precise measurements and exact cooking time? But guess what? You are correct for thinking such a thing. I don't really go by a set time when I make Thai food. I watch my food and when I think it's the right consistency and taste, that's when I am finished and ready to serve the dish. 
  • So once again, keep an eye on your curry. Give it a gentle stir because you don't want to hurt the potatoes but you need the spices to distribute evenly. When the curry thickens that's when it is ready.
  • Serve with rice and maybe a cool cucumber salad on the side.